Sunday, February 28, 2010

Hair Donation Photos to A Child's Voice Foundation

For more info on A Child’s Voice, check them out online http://www.acvf.ca/

As the day came I sat in the chair at the salon and thought if this was the right thing for me to do.....then I thought of those who could benefit from my hair donation.

Tracy, my wonderful hair dresser approached with measuring tape in hand. As she took the tape to my hair she questioned me about the style I was going for. After many looks through magazines, my style was selected and the cutting began......

Tracy combed and dried it!
 The Weigh in...
  
                              The massacre..                                 

The length.....

The donation measuring 12.5"

The final do.
This was a great day!!

Friday, February 26, 2010

Fashion Week - Top Shop Update

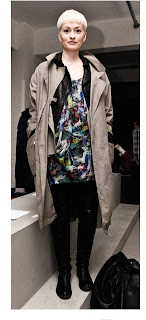
The Final Touch likes to keep updated in the fashion world and Top Shop helps us. From the London Fashion week was Feb 19 to Feb 23.


Here are two styles that Top Shop said was The Best in the show.


You can get these looks at Top Shop and just a little bouns is half price shipping.

Enjoy!

Thursday, February 25, 2010

Sale of the Day!! - Jesse Kalisher Gallery 50% to 70% off

Jesse Kalisher Gallery - 50% to 70% off @ http://www.hautelook.com/


You will found this sale at http://www.hautelook.com/
Enjoy!!

Think Pink Rooms

The Final Touch is thinking PINK. We ended up founding on http://www.freshhome.com/ and http://www.bloglovin.com/ these Think Pink Rooms.
An apartment from designer Betsey Johnson screams pink from top to bottom.


We hope you enjoyed!

Wednesday, February 24, 2010

MilkpodStudio's Shop

Our new ETSY favorite that was found today is MilkpodStudio's Shop


We hope you check out her other shop!
Enjoy!

The Big Day - Donation Day

Today is the day for my Hair Donation to A Child's Voice Foundation


Here is the story:

About 3 years ago I decided to cut my hair. It was pretty long already and summer was approaching, so I figured why not? Having short hair was not a bad thing at all. Actually I thought about how cool it would be on those really hot summer’s days.

It wasn’t until after it was cut that I heard about donating it for the benefit of children. I did some research and found “A Childs Voice Foundation”, they run a charity called Angel Hair for Kids. This is a non profit organization that is run right around the corner from the Final Touch. There are guidelines to follow when donating, listed below.


Hair Donations:


1. Please ensure your hair has been washed and is thoroughly dry before it is cut. Please do not send wet hair.


2. Hair must not be chemically treated or processed.


3. The hair donation must be a minimum of 10”/25cm.


4. Pull curly hair straight to measure during cutting procedure.


5. We suggest that you have your hair cut at by a hairdresser.


6. Secure ponytails or braids with rubber bands at both ends.


7. Wrap the hair in tissue paper.


8. Place hair in an envelope and include a donator’s contact information so we may

mail their certificate of appreciation. (Please print clearly).


9. If possible please include a “toonie” to help us cover mailing costs.


10. You may mail or deliver the hair donation to A Child’s Voice Foundation™ office


So with three years gone by and my hair being unchemically treated and about 12 inches long I venture to the hair dresser in 2 weeks for a cut.


I will keep you updated with what happened......


For more info on A Child’s Voice, check them out online http://www.acvf.ca/

Tuesday, February 23, 2010

DIY Project

We were looking at http://www.diyideas.com/ and found that we need to share a great DIY project with you all.


Paint a Door


Paint a door front using our free pattern to add pop to a plain-Jane piece of furniture.


Painted Door Materials:

Painter’s tape

Transfer paper

1/2-inch flat artist’s paintbrush

White and tan acrylic crafts paint


Painted Door Directions:

1. Download the swirl pattern here. Enlarge the pattern as desired using a photocopier.
2. Position the pattern on a door and tape the edges in place. Using transfer paper, trace the outlines. Remove the pattern. Note: If needed, lengthen the pattern at the top and bottom of the center design (indicated by dashed lines) to fit your cabinet door.
3. Paint all areas of the design white. Add shading with loose strokes of tan.

Enjoy!!

Monday, February 22, 2010

Sale of the Day!! Bombay - Winter White SALE up to 50% off

Bombay - Winter White SALE up to 50% off

Krystle Copeland, Oil Painter:


Krystle Copeland is an emerging young Canadian painter who loves colour and creative details. With a Master’s in Art History from the University of Western Ontario, she draws inspiration from historical painters with a similar love of colour, artists such as Georgia O’Keeffe and Mark Rothko. Her oil paintings are drawn in pencil from photographs she takes herself, and then painted over the course of a few weeks in oils.


This poppy was inspired by Georgia O’Keeffe’s paintings of red poppies, and was drawn from a personal photograph that the artist took. This painting was recently donated to a fundraising auction for a Toronto area charity.


These garden roses were painted from a photograph taken in Monet’s garden in Giverny, France. Krystle completed the painting in Alton, Ontario at an artist-in-residence program with the Bartlett Gallery.

To see more of Krystle’s work, check out her website at: www.krystlecopeland.com

Sunday, February 21, 2010

Free Liberty of London Patterns

Free Liberty of London Patterns

Enjoy!
Follow my blog with bloglovin

Sale of the Day - Zodax 40% to 60% Off

Zodax design philosophy is founded on a basic respect for nature's ability to balance color, shape, and stimulate the senses. Whether it be Home Fragrance, Décor, Tabletop, Textiles, or Entertaining, each one of our items is crafted with the care, quality, and attention to detail that separates us from the competition. Our mission is to create looks and collections that are fashion forward, quality and value driven.


Check out http://www.hautelook.com/ for Zodax Sale.

Enjoy!!

Saturday, February 20, 2010

Friday, February 19, 2010

Coming Soon!!

Krystle Copeland, oil painter:


Can't Wait!

Sales of the day!

Statements by J and NEXXT - Sale 50% to 80% 0FF

Statements by J. was founded with the commitment to produce the finest in home furnishings. Skilled artisans all over the globe and in such countries like India and Vietnam meticulously execute each piece to fit the needs of the hip and sophisticated home owner. They company was created as an antidote to the uber-chic, fancy, overpriced furniture and accessories in our industry. Beautifully designed, affordable home decor carried at trendy, upscale specialty boutiques.


NEXXT - nexxt by Linea designs manufactures and distributes contemporary home decor and lifestyle accessories. Today's consumers demand exceptional design and quality combined with affordability and value. At nexxt by Linea we are constantly experimenting with materials and textures, studying trends and lifestyles, and creating interesting, innovative and functional products.


Based in Toronto and Boston, the nexxt by Linea team strives to provide product and service that surpasses the desires of today's consumer—beautiful yet functional home décor and lifestyle products.


ENJOY!

Thursday, February 18, 2010

Pretty In Pleat - DIY Project of the week

We watch this last week on City Line and wanted to share it with our readers.


Mary Dobson offers these simple instructions on how to make your own pleated cushions. Pleated Cushions


Materials:

Fabric

Cushion form

Thread

Scissors

Grid ruler

Measuring tape

Disappearing marker pen

Pins

Iron


Instructions:

Measure the cushion form and add 1 inch all around for seam allowance and cut one layer for the cushion back to this size.

Determine the number and size of pleats required. In this example, the cushion is being made with four pleats, each 1 inch deep. For each pleat in this size, add 2 extra inches to the length of the cushion front fabric in addition to the 2 inches for the seam allowance. The width of the front fabric layer will be the same as the already cut back layer. Tip – Cut this section several inches larger to begin and trim down to exactly match the back layer once all of the pleating has been finished.

Working on the front side of the fabric, determine the placement of the top pleat and move forward 1 inch. At this placement point, mark a straight line across the width of the fabric with the fabric marker. Repeat every three inches. Be sure to keep the line perfectly parallel with the top cut edge.

Move an ironing surface and fold the fabric wrong sides together along each marked line and press. Pin the secure and move to sewing machine.

Pin to secure and machine stitch 1 inch in from the pressed edge. Tip – the fabric may want to creep along as you sew so pinning is important but you also can alternate the direction you begin sewing from.

Move back to the ironing surface and hand press the pleats in the direction you would like them to sit and then turn pleats down on the board and steam press for the back.

Place the cushion back layer right sides together with the pleated front and trim as needed to make both layers the same size.

Machine stitch the two layers together and apply zipper to bottom edge if desired.

Finish and trim seams and flip right side out. Press and insert cushion form.


Alternatives:

For intersecting pleats add calculated width and length to front section. Press and stitch all of the pleats in either the length or the width and then work in the alternate direction.

For butterfly pleat, press and stitch the pleats in place and then pull back the center of the pleats and hand or machine stitch to secure.

Here is the link to Video Pretty In Pleat - CityLine

Enjoy!